.svg)
How To: Set up Microsoft Dynamics 365 Business Central E-Documents with Logiq


This documentation focuses strictly on end-user configuration inside Business Central. All technical backend configuration (API users, credentials, infrastructure, and routing) is handled by Logiq.
Prerequisites
- Microsoft Dynamics 365 Business Central online environment
- E-Document Core app installed (Microsoft standard app)
- Active customer agreement with Logiq
- Permissions to install apps and configure E-Documents
Please be advised that Microsoft Business Central is continually updated with new features. As such, certain details in this guide may become outdated as newer versions are released. For the most current information, consult the official Microsoft documentation whenever necessary.
Microsoft's official documentation is located here: https://learn.microsoft.com/en-us/dynamics365/business-central/finance-how-setup-edocuments-external
Step 1: Install the Logiq E-Documents Connector
Install the Logiq connector from Microsoft AppSource before starting configuration.
1. Select Search (Alt+Q).
2. Search for E-Document Services.
3. Choose Install E-Documents integration from Marketplace.
4. Locate and install the Logiq E-Documents connector.
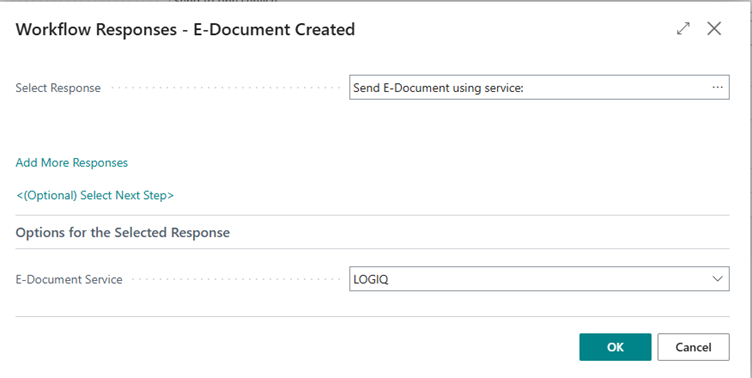
Step 2: Create an E-Document Service
The E-Document Service defines how Business Central communicates with Logiq.
1. Open E-Document Services.
2. Select New.

3. Set Service Integration to Logiq.
4. Select Document Format: PEPPOL BIS 3.0 (recommended).
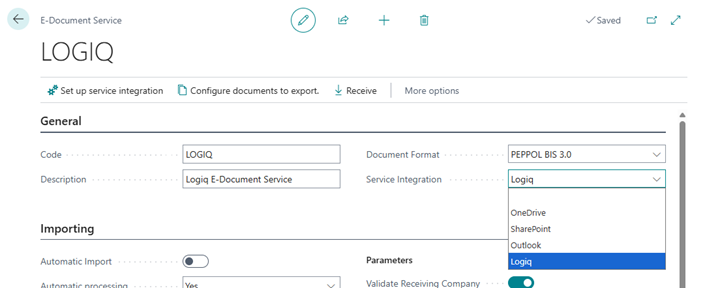
5. Review mandatory fields.
6. Select Setup Service Integration.
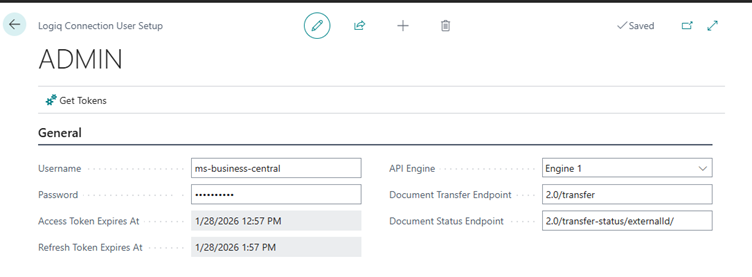
Step 3: Configure the Logiq Service Integration
The Logiq connection setup page opens automatically.

- Technical URLs are prefilled by the connector.
- Select the environment (Test or Production) as instructed by Logiq.
- Enter the user credentials and other information provided by Logiq.
- Complete both General Setup and User Setup.
Step 4: Set Up Company Information (Required)
Before sending e-documents, company identification data must be completed. This information is required for Peppol and other e-document networks.
1. Select Search (Alt+Q) and open Company Information.
2. Verify standard company details (name, address, country).
3. Complete the following mandatory fields:
- VAT Registration No.
- SWIFT Code (for your primary bank)
- Bank Branch No. (if applicable)
- GLN (Global Location Number), if used
- Enable Use GLN in Electronic Documents if required
4. Close and save the page.
Microsoft reference: Company information for e-documents
https://learn.microsoft.com/en-us/dynamics365/business-central/finance-how-setup-edocuments-external
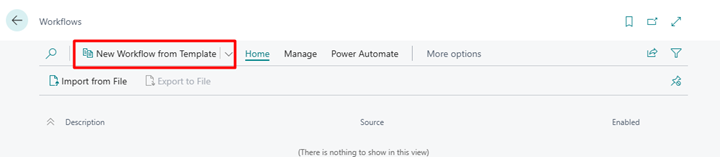
Step 5: Set Up E-Document Workflows
E-documents are sent using workflows. Documents will not be sent unless a workflow is enabled.
1. Open Workflows.
2. Select New workflow from template.
3. Choose an E-Documents workflow template.
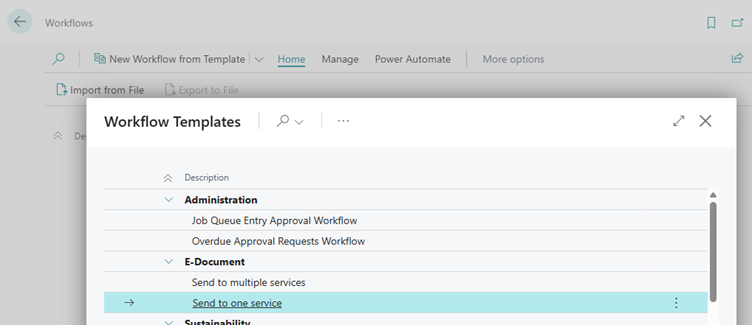
4. Review steps and conditions.
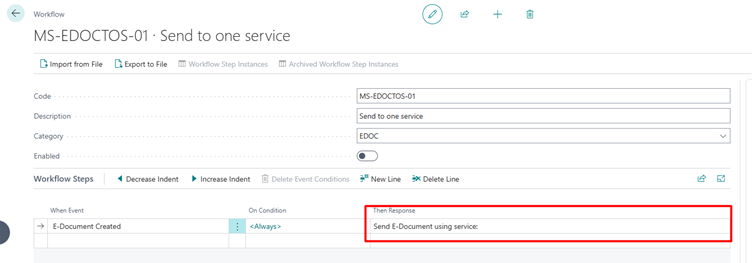
5. Make sure to enable the workflow, or the sending will not work.
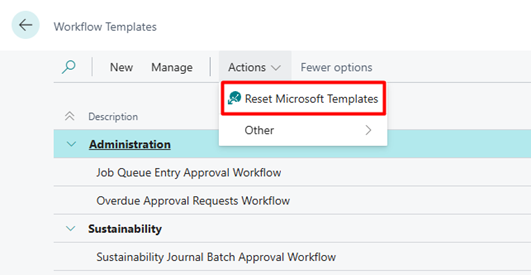
If you do not see the E-documents workflow template, go to Workflow Templates page and select action Reset Microsoft Templates.
Step 6: Configure Document Sending Profiles
Document Sending Profiles control how documents are delivered to customers.
1. Open Document Sending Profiles.
2. Create a new document sending profile.
3. Select E-Document as the sending method.
4. Save the profile.
Assign the profile to customers or mark it as Default to apply it automatically to every customer.

Tip: Select “show more” on General tab in Customer Card to see the Document Sending Profile
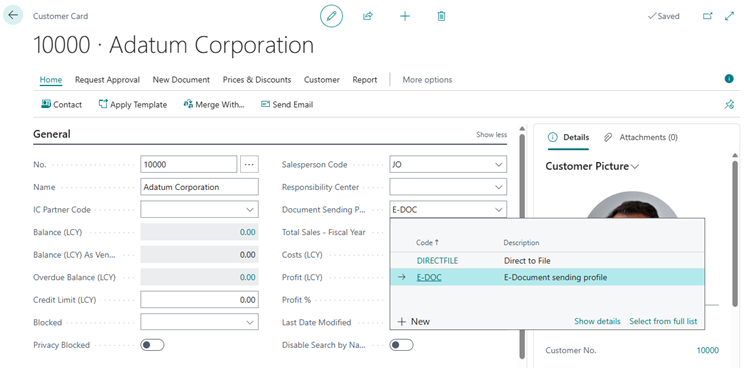
Step 7: Set Up Customers to Receive E-Documents
Your customers must be configured to receive e-documents.
1. Open Customers and select a customer.
2. On the Customer Card, select Show more on the General FastTab.
3. Assign a Document Sending Profile that uses E-Documents (unless the sending profile is set at Default).
4. Verify customer identification details such as:
- VAT Registration No.
- GLN (if applicable)
5. Repeat for all customers receiving e-documents.
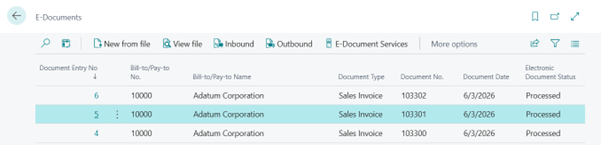
Step 8: Send and Monitor E-Documents
After setup, sending e-documents is part of the normal sales process.
- Post sales invoices or credit memos as usual.
- Documents are sent automatically via Logiq.
- Monitor status and errors from the E-Documents page.
Common Validation Errors When Sending E-Documents in Business Central
This section describes the most common validation errors encountered when sending e-documents (for example PEPPOL BIS 3.0 invoices) from Microsoft Dynamics 365 Business Central using an external access point such as Logiq. The validations described here are enforced by Microsoft Business Central itself before documents are sent externally.
These errors are typically caused by missing or inconsistent master data. In most cases, the document is not transmitted to Logiq or the e-document network because Microsoft Business Central blocks the sending process during validation.
1. Country/Region Code Is Missing or Invalid
Typical error messages include:
- "Country/Region does not exist. Identification fields and values: Code="
- "ISO country code is missing"
- PEPPOL XML generation failed
Cause:
Business Central requires valid ISO country codes when generating structured e-documents. Errors occur if the country is missing, invalid, or not linked to an ISO code.
Where to check:
- Countries/Regions: Ensure the country exists and has an ISO Code
- Company Information: Country/Region Code
- Customer Card: Country/Region Code
- Sales document: Bill-to and Ship-to addresses
2. VAT Registration Number Is Missing
Typical error messages include:
- "VAT Registration No. must have a value"
- "Supplier VAT ID is missing"
Cause:
VAT registration information is required by Microsoft E-Documents and PEPPOL validation rules.
Where to check:
- Company Information: VAT Registration No.
- Customer Card: VAT Registration No. (if required by recipient)
3. GLN or Peppol ID Is Missing or Incorrect (When Used)
Typical error messages include:
- "Party identification is missing"
- "Invalid endpoint identifier"
Cause:
When GLN or Peppol IDs are used, the values must be present and correctly formatted.
Where to check:
- Company Information: GLN and "Use GLN in Electronic Documents"
- Customer Card: Peppol ID or GLN
4. E-Document Workflow Is Not Enabled
Typical symptoms:
- Document posts successfully
- No e-document is created
- Nothing appears on the E-Documents page
Cause:
E-documents are only created and sent when an E-Document workflow is enabled.
Where to check:
- Workflows: Ensure an E-Documents workflow exists and is enabled
5. Document Sending Profile Is Missing or Not Assigned
Typical symptoms:
- Documents post normally but are not sent as e-documents
- E-Documents list remains empty
Cause:
The customer does not have a Document Sending Profile configured for E-Documents.
Where to check:
- Document Sending Profiles
- Customer Card: Document Sending Profile
6. Incomplete Address Data on the Sales Document
Typical error messages include:
- "Postal address is incomplete"
- "Country code missing on document address"
Cause:
The posted document inherits address data from the customer, bill-to, and ship-to addresses. If any address is incomplete, validation fails.
Where to check:
- Original Sales Order or Sales Invoice
- Posted Sales Invoice: Bill-to and Ship-to sections
Important Notes
- Most validation errors occur before documents are sent to Logiq or the e-document network
- Errors are logged on the E-Documents page in Business Central
- These validations are enforced by Microsoft and cannot be overridden by Logiq